Please excuse the broken picture links on the blog. I'm in the process of moving all of my pictures from photobucket to smugmug and it's taking a lot of time. thanks for your patience!

Thursday, April 28, 2011

Toy Box card

Since I've been neglecting my stamps, I decided to just open one of my stamp drawers, grab out a set, and make a card with it. Here's what I came up with.

stamps: Toy Box from Stampin' Up
cardstock: Stampin' Up
patterned paper: Die Cuts with a View (I think it's the recycle stack or something)
markers: Copic (used to color them and also I used it to [crudely] add color outlines to the rectangles).
buttons: I *think* they're from Oriental Trading and I used thin cuts of paper to make the 'thread'.

Monday, April 25, 2011

Easter Egg Boxes

I used my Silhouette and a neat Silhouette cut file to make these egg boxes. I added a bit too, and I'll explain that below the pics.


After putting the first box together I decided I wanted something extra instead of just the cut outs of the egg. So I added some glitter-here's how I did it. First, while the egg box was still on the mat (in Studio) I created an oval that was just a bit bigger than the egg portion of the box. I dragged the box off the mat and cut out the oval using some scrap cardstock for a template. Then I took some packing tape and stuck it to the shiny side of freezer paper just to have it on something solid while I cut it out. I used the template to draw the oval shape on the tape and cut it out with scissors. I removed the freezer paper backing and stuck the tape over the backside of the box so the sticky side faced front through the openings of the egg shape. I covered the sticky side with glitter (Art Institute and Doodlebug brand). Then I used the silhouette to cut the oval from paper that matched the color of the glitter and glued that to the back to make the colors pop more. In real life it looks much more sparkly-it's hard to catch that with a camera. I stole borrowed some Easter grass from my kids' baskets and we settled the eggs into their little nests. Then we were off to give them to Grandma and Grandpa (along with some decorated cookies). Paper is all from Stampin' Up.

Friday, April 15, 2011

My current project

I apologize for not posting much lately. I am working on this quilt and it's slow going-it's not like a card that I can turn out in one night (but there are people who can make a whole quilt in one day. I am not one of those people). It's for my friend Melissa and it will be (when it's done) a boxy stars quilt made with Moda Bliss fabric. I can't wait to see this come together some more-it's an amazing line and a great pattern.

So cheer me on because I have a hard time keeping up with my sewing.


Saturday, March 26, 2011

More Silhouette cards

Can you tell I'm having fun with my new toy?? I ordered some of the Silhouette sewable interfacing so I am hoping to have a fabric craft done soon. I am also working on a quilt for a friend and will probably start posting a few pics of my progress (so she doesn't wonder what is up with her quilt).

Last week I wanted to try making a card using Silhouette's Studio software to cut from, but using an SVG file. So I picked out a design from the Lettering Delights Spring-a-ling set. I opened it in Inkscape, did a path/object to path (this seems to make it work better), and then saved as a dxf file. Then I opened it in Studio and went from there to resize. Then I made a shaped card base by doing an offset on the flowers and added a rectangle to the bottom. I duplicated the shape, mirrored it, aligned the two sides, and welded them to make the base. Then I cut all the pieces out with the Silhouette. I used Paper Trey Ink cardstock for the card base, Stampin' Up patterned paper for the flowerpot, Lasting Impressions and Stampin' Up patterned paper for the flowers, Bazzill cardstock for the stems and Stampin' Up cardstock for the flower centers. The gray on the bottom is Bazzill cardstock I cut in a strip (with my paper trimmer). I am loving the shaped cards and they're so easy to make in Make-the-Cut or Studio software.


On this next card, I wanted to try out the Silhouette's print and cut feature. So I found a graphic I liked from the Lettering Delights Harajuku Girls set and used the Studio software to print it and then cut it out with the Silhouette. My first try was about a millimeter off. I don't know what I did wrong but the second try was a success! I used Make-the-Cut to cut out the letters from a font called Mouseyer (I don't think the Studio software has the ability to load a font that isn't installed) and I also used it to cut the pink oval. Card base and oval are Stampin' Up cardstock. The letters and background paper are KI Memories patterned paper and the design is printed on and cut from Neenah Classic Crest cardstock. When I showed this to my 13 year old daughter, she got that look in her eye. I think she's already decided to give this to her teacher or one of her friends.


Tuesday, March 22, 2011

You're a Hoot

Looks like I'm really into birds these days! The next card I post will not have a bird. I promise. This card was made from some graphics by Nancy Kubo which I separated and traced using Photoshop Elements and Make-the-Cut. I cut it out with my brand spankin' new Silhouette SD. Paper is all from Stampin' Up and Bazzill.


Thursday, March 17, 2011

You're Tweet

I decided to upgrade from my Cricut to a Silhouette SD. It arrived yesterday so I got it all set up to work with Make-the-Cut and today I made this little shaped card. I used tutorials from my friend Jin's website, underacherrytree.com, to make the shaped card base and used svg files from Lettering Delights to cut out the images. The bird is from the Twitter Park svg set and the letters are from the Sweet Nothings set. There isn't a "you're" in the set, so I combined images to make it and used an apostrophe from a regular font. The silhouette cut like a champ once I got the hang of it (I have a cold so it took me longer than normal. That's my excuse, anyway)! The card base is Paper Trey Ink 110# cardstock and the rest of the papers are from Stampin' Up. Everything cut easily with just one pass of the cutter (something I was concerned about but had no reason to be-while I was "learning" I cut clear through my mat somehow). Even the intricate parts, like the flowers on the wing, cut perfectly. I am very happy with the Silhouette so far!


Thursday, February 24, 2011

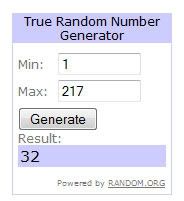
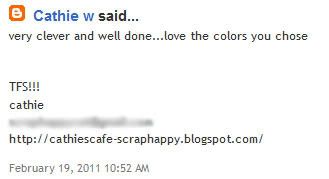
Blog Hop Winner!!

Thanks to everyone for hopping with me! The winner of the Lots of Pun stamp set is...

Cathie W!!


congratulations Cathie! I will email you to get your information so you can get your prize!

*please note that when I did the drawing there were 217 comments. The others were made after.
Related Posts Plugin for WordPress, Blogger...