Please excuse the broken picture links on the blog. I'm in the process of moving all of my pictures from photobucket to smugmug and it's taking a lot of time. thanks for your patience!

Friday, May 25, 2012

Snappy Birthday

I made this for the deconstructed sketch challenge #53. I just got this paper pack in the mail and it wasn't quite what I was expecting but it's still pretty cute and goes well with the crab & company set.
stamps: stampin' up crab & company
markers: copic
ink: memento, stampin' up (for sponging)
card stock: stampin' up
patterned paper: echo park paradise beach
border punch: ek success
circle and scallop circle dies: nestabilities

ps-thanks for telling me about feline playful's blog!

Thursday, May 24, 2012

My Memories giveaway winner!!

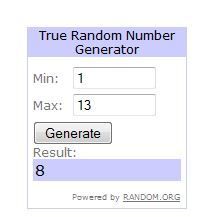
And the winner is...
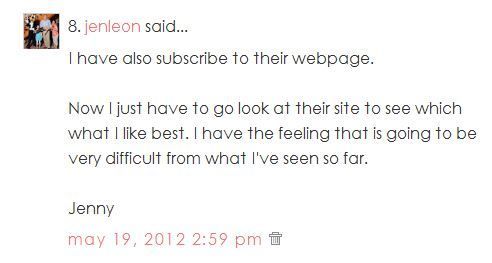
Jenny!
Congratulations!! I will send you an email and get your information for your free software. Thanks to everyone for entering!

Wednesday, May 16, 2012

My Memories Suite Giveaway!

This giveaway has ended

This is a sponsored giveaway by My Memories Digital Scrapbooking Software.

I've recently had the opportunity to try out this amazing program and I love it so far! Even though I am primarily a paper scrapper, I've been moving to some digital because of the ease of storage. Now that I've tried this, I can add ease of creating a page. It was so nice to "audition" different embellishments and papers and to be able to resize my pictures as I went. With both of these pages I did a lot of resizing after I had almost finished the page, so if I had been doing them with paper, I would have had to just settle for the sizes I had or reprint. This was a lot better. Even if I wanted to do a paper page, the My Memories Suite would be great to preplan my layout before committing it to paper and scissors and glue.

Here are the two pages I've made so far. The first uses all items that are included in the software. The second uses some digital papers and elements I already owned (all by Crystal Wilkerson). I love that I have so many options.
Now you can win your own copy of this great digital scrapbooking software! To enter, just do one or more of the following:

entry 1: go to the My Memories website and under "themes", take a look at what they have to offer, and leave a comment telling me your favorite item.

entry 2: join the My Memories mailing list by signing up at their website or their blog. Leave a comment telling me you signed up.

entry 3: go to the My Memories facebook page and click on "like". Leave another comment telling me you liked them.

entry 4: follow My Memories on Twitter. Then leave another comment telling me you are following them on twitter.

and that's it! I will use random.org to choose a name in a week. Please be sure to provide a way for me to get in touch with you if your email isn't in your profile.

If you just can't wait and you'd like to buy the software, just go to My Memories and use code STMMMS43379 to get $10 off the price of the My Memories Suite V3 PLUS $10 off in the My Memories store!.

Thursday, May 10, 2012

The baby quilt is done! Plus a fishy toy

I finished the quilt for my daughter's speech therapist. We gave it to her today, and she loved it! It even inspired her to try quilting. She doesn't sew but she has a sewing machine and wants to learn to use it. So Samantha will have a different speech therapist next year, since her current one will be taking a year off to stay home with her baby. Sammy's a little sad about that. But on to the quilt. The pictures were a little tough to get-it was windy outside and I was determined to get outside pictures since the light is so much better.

the front (side note-I LOVED doing the bias binding and rounded corners):
the pieced back:
closeup of the label (I blurred out our last name). My daughter wrote out the label and then sewed some of it:
And here's a little sleepy fish toy I made at the last minute-I found the pattern on the moda bake shop HERE. I did a few things differently. I opted to use a blue/green color palette instead of making it as colorful as the tutorial shows. I omitted the ribbons since I wasn't sure if the ribbon I have would survive multiple washings. I used a snap (the kind used on baby clothes-very secure) instead of the velcro, and I machine sewed the opening shut. I wasn't sure my hand stitching would be secure enough. I used some packaging from a scrapbook album for the cellophane and I bought a set of washable wrist rattles and cut the rattle out of one of them to use inside the fish's body. I put it through the wash and a hot dryer before giving it to make sure it would survive both.
And here they are, all wrapped up and ready to give:

The fabric is Scoot from Riley Blake.

Wednesday, May 9, 2012

Cards & Things Sketch Challenge #119

I made this for the Cards & Things Sketch Challenge. I got the idea for the rest of it on the way home from dropping my kids off at the library. I'm trying to do more challenges, so if anyone knows of any other favorite challenge blogs, please feel free to leave a comment with a link. I started off using Make-the-Cut. I used the Mahalo set from Lettering Delights to make the coconut drink. When I make a shape to go on a card, I make a card-sized rectangle in Make-the-Cut first and then I can resize the shape to the right size for the card front. Then I just delete the rectangle or turn off that layer when I cut. For the letters I used a font called Grilled Cheese. I added the letters to the mat, then I used the bezier warp thing to make them curve the way I wanted them. This was done mostly through trial and error since I don't really know how all the controls on the bezier warp thing works. I added some tiny rectangles to some letters and used boolean join so that I wouldn't have to deal with putting the center parts on separately, but I made a couple of them too small and had to deal with it anyway. Once I got the word all done and sized, I found that the lines on the virtual mat in Make-the-Cut don't match up with the lines on my silhouette mat. So I exported the svg and opened it up in Silhouette Studio Designer Edition to do the cutting-it was a little easier to make sure the text was in the right spot for my card front. Before I cut, I did a test sketch on some white paper to make sure I had it in the right spot. The card stock is all from Stampin' Up and Bazzill. I used a Sakura Gelly Roll pen to make a little shiny spot on the cherry. The bottom border was done with a Martha Stewart border punch. I made the blue card base about an inch short on the front, then I added the orange card stock (after punching the border) so that it could be seen through the cut-out letters and on the bottom. I could have sworn I had it centered when I punched it but maybe that punch doesn't center as easily as my other ones do. Or maybe I just messed up.

Saturday, May 5, 2012

Baby Boy Quilt Progress

I decided to play with instagram a little and this pic is kind of blurry but that's ok. It's artsy. Yep, that's it. Artsy. So I have this much done on the baby boy quilt. I channel quilted it with lines about 2" apart and the only thing left is to cut and apply the binding and the label. I'm going to round the corners (hence the plate sitting there) and use bias binding. My daughter will write out the label and I'll print it onto photo fabric and we'll sew it on the back and it'll be ready. Her last session with her speech therapist (the quilt is for her baby, due in August) is May 16th but things happen so the goal is to get it to her on the 9th.

A post shared by Gale (@gale65) on


Wednesday, May 2, 2012

Resist Emboss Technique Challenge

I made this card in response to the technique challenge at Patty's Stampin' Spot. I don't do cards like this often and to be honest, I'm not so sure how much I like this one, but here it is anyway. I used the Stampin' Up Upsy Daisy set and stamped it with black pigment ink and clear embossed. Then I sponged ink on it (Stampin' Up Pumpkin Pie, Summer Sun and Cool Caribbean). The sentiment is from the same set, stamped and inked with Not Quite Navy ink and punched with a tag punch. The patterned paper is from a couple of Stampin' Up mini paper packs. The sun is punched from Summer Sun card stock. The sun was my son's idea-I wasn't happy with the card and he thought maybe it needed a sun. It does look better with the sun.
Related Posts Plugin for WordPress, Blogger...