Please excuse the broken picture links on the blog. I'm in the process of moving all of my pictures from photobucket to smugmug and it's taking a lot of time. thanks for your patience!
Showing posts with label big shot. Show all posts

Wednesday, July 27, 2016

Happy to be Stuck With You


stamps: My Favorite Things Sweet Succulents
paint: Peerless Watercolors
patterned paper: My Mind's Eye
cardstock: Gina K (kraft), Stampin Up (green and red)
dies: My Favorite Things
card sketch: Freshly Made Sketches


Hello Beautiful


stamps: Simon Says Stamp Spring Flowers, Hero Arts Hello Stamp and Cut
markers: copic
stitched rectangle die: lil inkers designs
patterned paper: Imaginisce
cardstock: Stampin Up

Tuesday, May 6, 2014

Wedding card


I made this wedding card for my nephew and his new wife. The design is loosely based on the one shown in this blog post.

The dress shape was cut from a Silhouette store file and then put through an embossing folder (I think it's called Plum Blossom). The pink background was embossed with an embossing plate.

Ingredients:
Black and Blushing Bride card stock from Stampin' Up
Curious Metallic Cryogen White card stock from cutcardstock.com
Pearls (unknown)
Punches and ribbon from Stampin' Up

Tuesday, July 2, 2013

Manatee Love

I made this card for a friend that likes fish and manatees.


ingredients
digital stamp: mermaid with manatee by Paper Nest
white card stock: Paper Trey Ink
blue card stock: Stampin' Up
patterned paper: Stampin' Up
pearls: recollections (??) from Michaels
copic markers: E00, E11, E13, E21, E25, E27, E29,  G14, Y26, Y08, YG01, R30, BG45, BG49, BG45, BG000, V000, V15, V17, W000, W1, W3, W5, W7
punch: ek success
nestabilities

Sunday, May 19, 2013

Baby Gear - Animal Style

A family member told us last year that she was expecting, so of course, a baby quilt and some baby gear were put on my project list. I found out through her pinterest page that she liked zebra stripes and black and pink, and eventually, it was revealed that they were expecting a little girl. So I made her a few zebra themed things. A quilt, a bib, some burp cloths, some tiny shoes, and of course, a card (not zebra themed). I've had these things done for a couple of weeks now but was waiting for the baby to arrive to post them. She had her Friday night! A perfect and beautiful little girl.

the quilt:


the back-very wild!


My usual curved corners-here's a close-up. I did my binding a little differently this time. Normally I sew it to the back, fold it to the front, and zig zag the edge-not really caring how it looks on the back. This time I accepted a challenge from my sister and sewed it to the front, folded it to the back, and sewed in the ditch on the front, catching the back. It was a little slower but I like how it turned out!


a close-up of the label, which I made on my new embroidery machine using EQ Stitch to trace my signature. You can also see the serpentine stitch I used for the quilting. I love this stitch and learned how to program it into my Janome 6600 on the Janome 6500/6600 yahoo group.


The shoes, made from a pattern by Lena's Patterns on Etsy


The bib, made from this tutorial


from the back-it has little armholes and gives pretty good coverage


Half a dozen burp cloths made from cloth diapers-using this tutorial (with a few changes):


And the card-another clothespin card.

ingredients:
kraft and pink card stock, patterned paper, clothespins, and cloud embossing folder: Stampin' Up
white card stock: Georgia Pacific
dies: nestabilities
twine: Divine twine
onesie shape: Lettering Delights Baby Simple Shapes set
font: Hipster Script

Friday, May 3, 2013

Thanks, Girlfriend!

A few weeks ago my friend Jin sent me the most amazing Hello Kitty care package. If you didn't know this, I do love me some Hello Kitty. I asked her to pick up the Hello Kitty date stamp at Michaels for me, since I have no Michaels nearby, and she picked up a bunch more! Journals, tapes, embellishments, bookmarks and MORE. I'm a grown-up for the most part, but it's still fun to get a surprise in the mail! So I wanted to make her something special to show my appreciation. Since Jin isn't a quilter, I felt somewhat confident making her a quilted pillow. I had my doubts through the whole thing, like I do with pretty much every project, but I sent it anyway and she loves it! Here's the pillow I made using simple 4-patches and a heart patch from EQ, plus some white sashing. Fabrics are all from my stash and some were leftovers from other quilts.


and I made this super simple card for her too. I always want to use these cute mini clothespins from SU but they don't fit well in an envelope so this was the perfect opportunity.


ingredients:
white card stock: neenah
blue card stock: stampin' up
baker's twine: martha stewart
clothespins: stampin' up
stamp and ink: stampin' up
cloud embossing folder: stampin' up


Thursday, February 28, 2013

A Simple Thanks


These are the cards I made for Christmas thank-yous. I wanted to keep it simple but still kinda nice, know what I mean? So I decided an embossing folder and a cut out shape would be perfect.


ingredients:
cardstock: Bazzill (blue) and Neenah (white)
embossing folder: unknown
"thanks" shape: Silhouette store


Friday, January 25, 2013

Happy Birthday, Girlfriend

***I wanted to answer a couple of the questions in the comments. I definitely used a pattern for the pillow. The signature is my actual signature though. I wrote it and scanned it and had a stamp made of it. So for this, I stamped it and then stitched over the stamping. The pillow didn't take long. I probably worked on it for about 5 days but only a couple hours a day. This includes starting it and changing my mind on the colors and starting over. It took me longer to find all of the fabrics I wanted to use. The original pattern was in the July/August 2007 issue of Quiltmaker magazine. They don't sell that issue anymore, but a very helpful commenter left a link to this site which is selling the pattern: Silver Linings Quilting. Thanks, Regina!! And thanks for everyone else's comments too. I appreciate each and every one. :) ***

I have a friend from high school who recently had a birthday. When we were in HS we were close but had a falling out (we laugh about it now). Shortly after HS we made up and became practically inseparable. Now we live 2000 miles apart and thanks to facebook, can keep in touch easily. She recently lost her dog so I decided to make her this cute paper pieced puppy pillow that I saw in a magazine a while back. She has had a rough time of it lately, so I was happy to send her something to lift her spirits. Here's the pillow:


Here is the back. I used this tutorial to put the zipper on it. When you use a full pillow form like I did, the front seems like it looks better with a zipped back and I liked the look of a hidden zipper. The tutorial was very easy to follow.


I decided to embroider my name on the back. I used my usual name stamp to stamp the image, and then just did a simple backstitch to embroider it.


Here is a simple card I made for her. I knew she would probably get it late (although she got it later than I was hoping) so the inside says "oops! It's a hare past your birthday". I didn't think to take a picture of the inside.


ingredients:
Stampin' Up Birthday Banter stamp set
Stampin' Up Cloud embossing folder
Copic Markers
EK Success border punch
Kraft cardstock: Stampin' Up
White cardstock: Neenah Paper
Green Cardstock: Bazzill

Saturday, December 29, 2012

Christmas cards part 2

Here are the other two cards I made for Christmas. I used the new style ink pads with these and boy, are they nice! Much easier to get a good solid image than with the old pads.


Ingredients:
Stampin' Up Word Play and Ornament Keepsakes
Stampin' Up Holiday Ornaments Framelits dies 
Embossing folder
Ink: Stampin' Up
Marker: Copic
Red cardstock: Stampin' Up
White cardstock: Neenah
Silver cord: Stampin' Up


Ingredients:
Stampin' Up Merry Messages and Christmas Lodge
Stampin' Up Top Note Die
Ink: Stampin' Up
Kraft cardstock: Stampin' Up
Patterned Paper: Stampin' Up
White cardstock: Neenah

Friday, December 28, 2012

Christmas cards, part 1

Here are 3 of the cards I made. I used my silhouette for all 3 of these, along with some other tools.


For the one above, I used the following:
The tree from the Lettering Delights Feliz Navidog SVG Set.
Madison Window die from Poppy Stamps
Stampin' Up scalloped border punch
Stampin' Up Merry Messages set
Ink: Stampin' Up
Patterned paper: Stampin' Up
Green and yellow solid cardstock: Stampin' Up
Blue solid cardstock: Bazzill
White cardstock: Neenah 


For the one above I used the following:
Presents from the Lettering Delights Tannenbaum SVG set
EK Success scalloped punch
Red cardstock: Stampin' Up
Green cardstock: Bazzill
Patterned Paper: Die Cuts with a View
White cardstock: Neenah  
Stampin' Up Seasonal Sayings set
Ink: Stampin' Up 


For the one above I used the following:
Shapes from the Silhouette store
Colored cardstock: Stampin' Up
White cardstock: Neenah  
Glitter: Art Institute
Embossing folder
The picture below shows the glitter a little better :)


Tomorrow I'll post the other cards I made.

Friday, September 21, 2012

Ornaments card

I have officially started on Christmas cards! Only I just made one and have a lot to go. Hopefully I can keep up this momentum. ha.

The ornaments are from the Lettering Delights Christmas Dee-Licious svg set and I cut them out with my Silhouette SD using Silhouette Studio. All of the paper is from Stampin' Up except for the white, which is from Paper Trey Ink. I think the twine is from Divine Twine. I also used my little sewing machine to sew around the red patterned paper. The white squares are embossed with the Sizzix stars and swirls embossing folder and punched with a 1.5" square from Creative Memories. One ornament is hanging crooked but I'm leaving it. I used a sketch from Retro Sketches.


In case anyone is wondering, these are the settings I use for cutting out Stampin' Up cardstock: blade 5 (4 might be enough), speed 5, pressure 33, double cut (it will cut through with a single cut but some sharp corners do better with a double cut).

Tuesday, September 4, 2012

Make a Cake

I've been wanting to try paper piecing and now I can say I did. I really liked making it! I won this set from a contest at Patty's Stampin' Spot and it is perfect for paper piecing. I used an older Mojo Monday sketch.


stamps: stampin' up make a cake
markers (for the pinwheel): copic
paper: echo park
blue card stock: stampin' up
ink: memento
dies: stampin' up and nestabilities


Friday, May 25, 2012

Snappy Birthday

I made this for the deconstructed sketch challenge #53. I just got this paper pack in the mail and it wasn't quite what I was expecting but it's still pretty cute and goes well with the crab & company set.
stamps: stampin' up crab & company
markers: copic
ink: memento, stampin' up (for sponging)
card stock: stampin' up
patterned paper: echo park paradise beach
border punch: ek success
circle and scallop circle dies: nestabilities

ps-thanks for telling me about feline playful's blog!

Monday, January 2, 2012

2011 Christmas Cards

Yep it's been a while. So anyway, these are the cards I made for Christmas this year.


This first one I made with a freebie file from the Silhouette store. I used my new favorite embossing folder, which is the stars & swirls from Sizzix. The baker's twine is Martha Stewart brand, the white card stock is Neenah and the red card stock and green patterned paper are both from Stampin' Up.


The next one was made with a file from Lettering Delights and cut out with the Silhouette SD. The embossing folder is from the evil Provo Craft. White card stock is Neenah and the rest of the card stock and the patterned paper is from Stampin' Up.


This is almost all from Stampin' Up. The off white card stock is Bazzill, the border punch is Martha Stewart and the baker's twine is Divine Twine from Whisker Graphics. I cased this card from Wrestlermomx2 on Split Coast Stampers. Thanks Wrestlermomx2!


This is a card I made to hold a gift card for my nephew. I used a tutorial from Jennifer McGuire. White card stock is Paper Trey Ink and colored card stock and stamp from Stampin' Up. I'm not sure about the patterned paper. The inside card stock is Bazzill. The image is stamped with memento ink and colored with copic markers. The inside scallop is from a Stampin' Up punch and the outside shapes were cut with nestabilities.

Friday, February 18, 2011

It's a Birthday Blog Hop-with prizes!!


Welcome to the Joyslife.com Birthday Blog Hop where we are wishing Joy a very happy birthday!! This is my very first blog hop so I hope I don't mess up! You may have come here from Ann Marie's blog. If not, then you can do the whole hop by going to Joyslife.com and clicking through to each blog on the hop. In case you get sidetracked, here is a list of all the stops in this hop.


So here is my birthday blog project. I decided to do a birthday place marker and cupcake picks. I love the new Lettering Delights Frogs and Kisses graphic set and svg set. Even though it seems to be a Valentine themed set, I thought it would make a cute froggy birthday theme. I did want to change the colors of my frogs so I used Photoshop to do that.


I used Make-the-Cut and my Cricut to cut out the parts for the place marker. The frog was directly from the svg file but I used googly eyes instead of the cut out eyes. I think frogs look great with googly eyes! I used various MTC functions to make the place marker with the sticking up part (technical terms here). The balloons were made from a balloon graphic I found online and converted to a cut file. For the two-tone balloons I cut out two, used punches to punch the holes, and then layered them together. I used some wire I had on hand to attach them to the place marker.


For the cupcake picks (easy peasy) I just chose a graphic from the Frogs and Kisses set, changed the colors in Photoshop, and resized and printed it onto card stock. For the other side I used a stamp from the All Around Sentiments set from Joyslife.com. I punched my stamped images and my printed images with a circle punch, matted it onto a larger colored circle, and then layered those onto scalloped circles cut with nestabilities. I stuck them together with Stampin' Up Dimensionals with a toothpick in between to stick into the cupcake. The doily is cut from a file I found on this blog and modified.


The bags were from Target. I like to keep bags on hand because I hate wrapping gifts. Hate it. The cupcakes are topped with crushed Smarties. Smarties are the Canadian version of M&Ms. Since my daughter is allergic to nuts, we don't buy M&Ms but Smarties are just as tasty and perfectly safe. I collected the red ones (had to eat a lot of other colored ones to get these), crushed them a little, and sprinkled them on.

Now for the blog candy, courtesy of Joy! Up for grabs is one of her amazing stamp sets, Lots of Pun. This is such a cute set! If you have the Create a Critter cricut cartridge you NEED this set-it goes perfectly with so many of the critters.
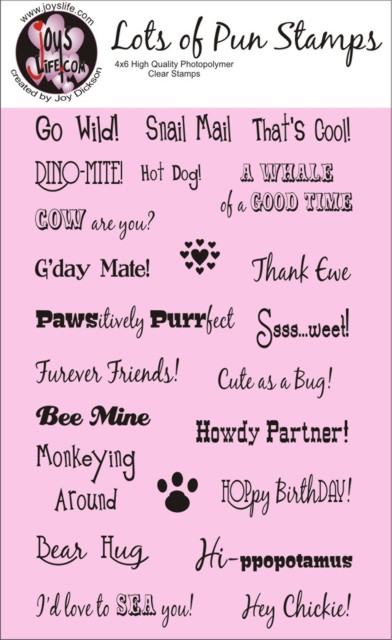

Here is how to win this set:
1. leave a comment on this post
2. become a follower and leave another comment letting me know you did. If you are already a follower of my blog, leave a comment letting me know that instead.

Sign ups end at midnight eastern time on Feb 22nd. Please make sure there's a way for me to get ahold of you. If you don't have your email in your blogger profile, please leave it in the comment for me. If you are interested in buying this or any of Joy's other stamp sets, just go to Joyslife.com's products page. Joy is offering free shipping right now too!

And now on to the next blog in the hop. Just click here to go to Erika's blog to see the next cool birthday project! But first, be sure to grab Joy's cute new button!! To add this button to your blog, simply copy and paste this code:
Joy's Life.com


Wednesday, February 9, 2011

Kitty Cat Valentines

I made these for my daughter to give to her dance classmates for Valentine's day. I saw them on my friend Jin's blog and let me tell ya, she is a dedicated crafter. It was all I could do to make these without throwing it all out the window and Jin made dozens! Good thing Sammy only has 4 other girls in her class. So I made 6 (but there are only 5 in this pic) so she could keep one for herself and also give one to her teacher. The svg file is called Animal Valentines and is from Lettering Delights. All paper is Stampin' Up. The original file had cut out eyes but I decided I liked the googly eyes better. The texture plate that I used for the body is from Sizzix. You can't see the texture on the first picture but you can in the closeup.


Monday, January 3, 2011

2010 Christmas Cards

Here are the cards I made and sent this year:

green cardstock, embossing folder, and word stamp: stampin' up
patterned paper: doodlebug
blue cardstock: bazzill
glitter: doodlebug
string: dmc
border punch: ek success
cricut cartridge: joys of the season


cardstock, patterned paper, ribbon, ink, and word stamp: stampin' up
embossing folder: sizzix
wreath stamps: the angel company
dies: nestabilities


blue cardstock, deer stamp, embossing powder, ribbon, tag punch: stampin' up
patterned paper: digital
phrase font: 2 peas
silver cardstock: unknown
dies: nestabilities


(unless you're Japanese or know about Japanese food you may not understand the humor of this one. Trust me-it's funny)
cardstock and patterned paper: stampin' up
embossing folder: sizzix
markers: copic
stamp: 2 scoops rice designs
dies: nestabilities

this is a small bag I made for giving away candy canes

paper: die cuts with a view
tag punch: stampin' up
stamp: stampendous (I think)
ribbon: unknown
snowflake: cricut (joys of the season cart) and a punch
bag: cricut (tags, bags, boxes & more cart)

Tuesday, December 7, 2010

Thinking of You - sympathy card

A friend of mine lost her mother recently so I made this card for her. I haven't made many sympathy cards so I never quite know how it should look but this came out nice, I think. I used an older mojo monday sketch.

stamps-stampin up
ink-memento black
markers-copic (see below)
papers-stampin up
nestabilities
ribbon-unknown
punch-stampin up

copic colors used:

Related Posts Plugin for WordPress, Blogger...